Creature Summoning Guide
This is a basic guide for summoning creatures. It is simple and easy to follow, but does not go into depth about decision making or situational creature picks.
Basics
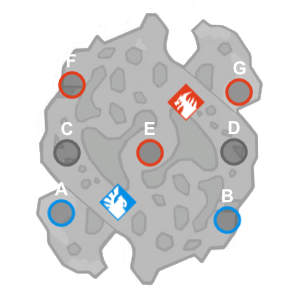
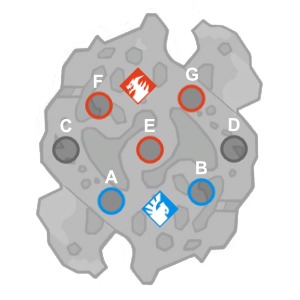
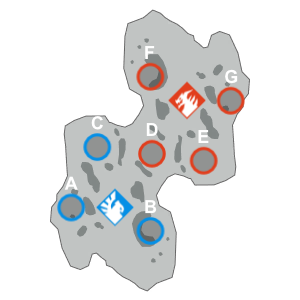
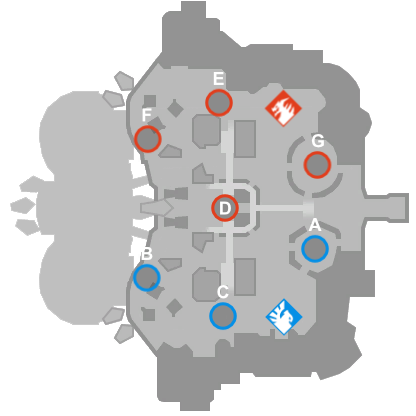
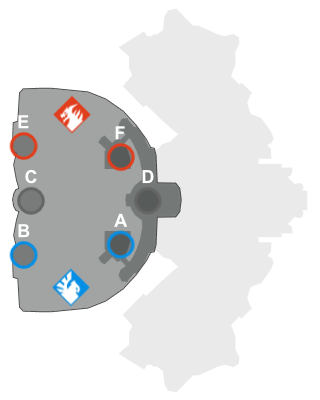
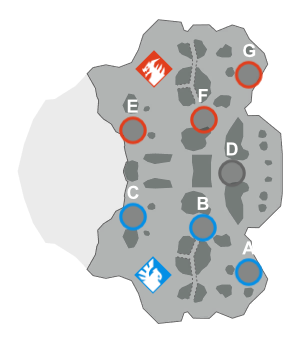
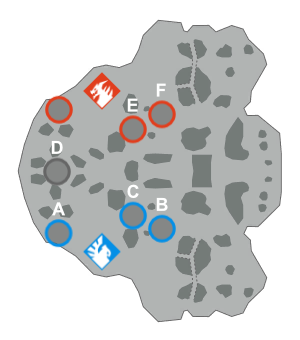
At the start of the match, each team summons young creatures on all of their ![]() team circles by standing on them and holding the corresponding number key (keyboard) or dpad direction (controller). See Map Specific Advice for a simplified view of what creatures are best on each point.
team circles by standing on them and holding the corresponding number key (keyboard) or dpad direction (controller). See Map Specific Advice for a simplified view of what creatures are best on each point.
Depending on the number of ![]() neutral circles, there will be a rush to establish control over each one and summon a creature there.
neutral circles, there will be a rush to establish control over each one and summon a creature there.
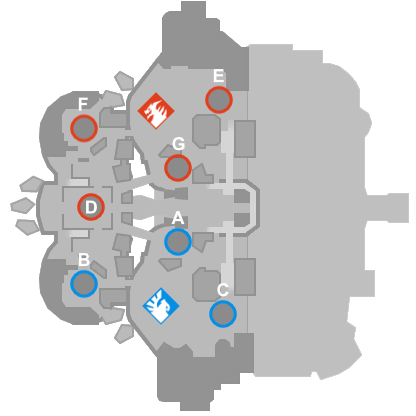
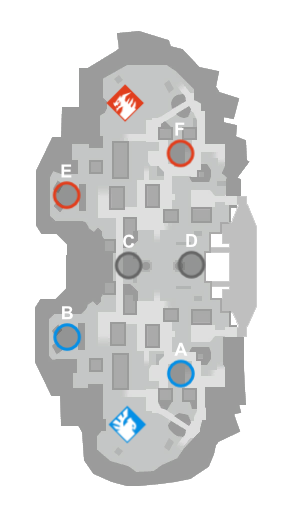
 0 circles, teams will just start poking and fighting in the middle of the map (ex. Ghost Reef)
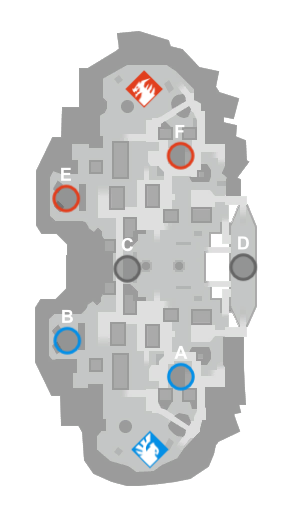
 1 circle, the entire team will fight for the circle (ex. Siren's Strand)
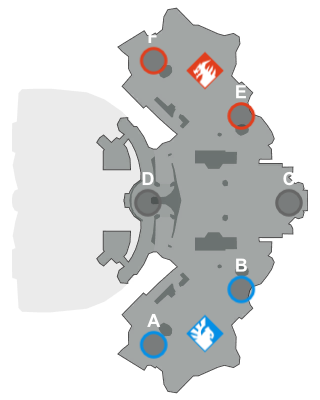
 2 circles, each team will try to control one circle (ex. Sanctum Falls)
As a beginner, do not summon a creature on a ![]() neutral circle unless your team is nearby to help you defend - summoning a young creature and then losing it will set your team back 10 power.
neutral circle unless your team is nearby to help you defend - summoning a young creature and then losing it will set your team back 10 power.
Upgrading Creatures
New players should avoid upgrading creatures until they gain understanding of the game, and instead use their hero's focus abilities as much as possible. Upgrading a creature carries a lot of risk, and can get your team into trouble if you are not aware of the game state. Adult creatures flash black for 20s after upgrading, and they cannot collect power, move, or attack during this time. Upgrading at the wrong time can lose the power race in numerous ways, and upgrading to the wrong type of creature can have disastrous long term effects for the match. Conversely if you see an enemy creature flashing black without many heroes defending, it is likely a great target to attack and score additional power for your team.
For experienced players, upgrading creatures becomes an integral part of each match, helping your team to win the power race more quickly and bolstering the defenses of contested ![]() points.
points.
- Do not upgrade a creature that will have to gather power in the next 25 seconds.
- If you see the yellow circle ticking up around the point on the minimap, then don't upgrade the point.
- Do not upgrade a creature on a point that enemies are currently attacking or about to attack.
- Adult creatures are vulnerable for 20s, which is plenty of time for the enemy team to kill them and gain a free 20 power.
- Do not upgrade a creature on a point close to the center of the map unless you have an advantage.
- The best time to upgrade these points are when the enemy is weak and has to go back to heal or respawn.
- If the enemy team is healthy and waiting in the middle of the map, they can push to your creature for free and fight your team without having to deal with a creature attacking them back.
- Do not upgrade a creature with exposed sightlines when enemy ranged heroes are ready to fight.
- For example, upgrading
 D on Siren's Strand with an enemy HK or Imani set up will allow them to freely attack the creature from afar and kill it before it can put up its deflect shield.
- For example, upgrading
As long as it doesn't put your team at a disadvantage, try to upgrade all your creatures as it both gives your team experience and makes it easier to hold each point.
Loadout
Up to 3 creatures can be equipped before heading into a match. By default new players start with the Mountain Cyclops in slot 1, Summer Bloomer in slot 2, and Cerberus Majoris in slot 3. These can be changed from Main Menu > Play > Creatures. In general it is always good to have a bloomer and cyclops equipped, as they both have immense strategical importance on almost every map.
New players should generally unlock either the Ancient Obelisk or Shadow Cerberus and equip it in place of the default cerberus for their third slot.
- The Ancient Obelisk can be summoned to reinforce your team on
 restricted central points, providing an advantage on maps like Ghost Reef. The younger version can also be used for fodder when you plan to immediately upgrade to an adult creature.
 - The Shadow Cerberus is highly evasive and teleports around, giving it greatly increased survivability. It is the perfect creature to put on a point vulnerable to backdoor pushes, as it will survive long enough for your team to come to its rescue.
- The Storm Drake is powerful offensively and periodically bombards nearby enemies with a shock AoE. It is a strong pick on smaller maps like Ghost Reef and Ember Grove, and can deal a ton of damage when its shock hits unexpectedly.
Creature Type Advice
- Bloomer - summon at a safe point that your team frequently retreats to.
- Cyclops - summon at any point where a wall completely shuts down a zone of the map.
- Cyclops are not good when the wall only partially shuts down a zone, such as point C on Ghost Reef
- Cerberus - summon sparingly, but they are great at detecting and stalling backdoor pushes.
- Drake - summon near a place where enemies frequent, when you don't need a bloomer or cyclops.
- Infernal - summon sparingly, in a place where a portal provides a large strategic advantage.
- Obelisk - summon once you gain control of a contested area, either to defend a
 restricted point that your team is trying to hold, or to block an enemy summon on a
  neutral point.
Map Specific Advice
| Guides | |
|---|---|
| Basic | |
| Advanced | |
| Gigantic | |
|---|---|
| Game | |
| Other | |

